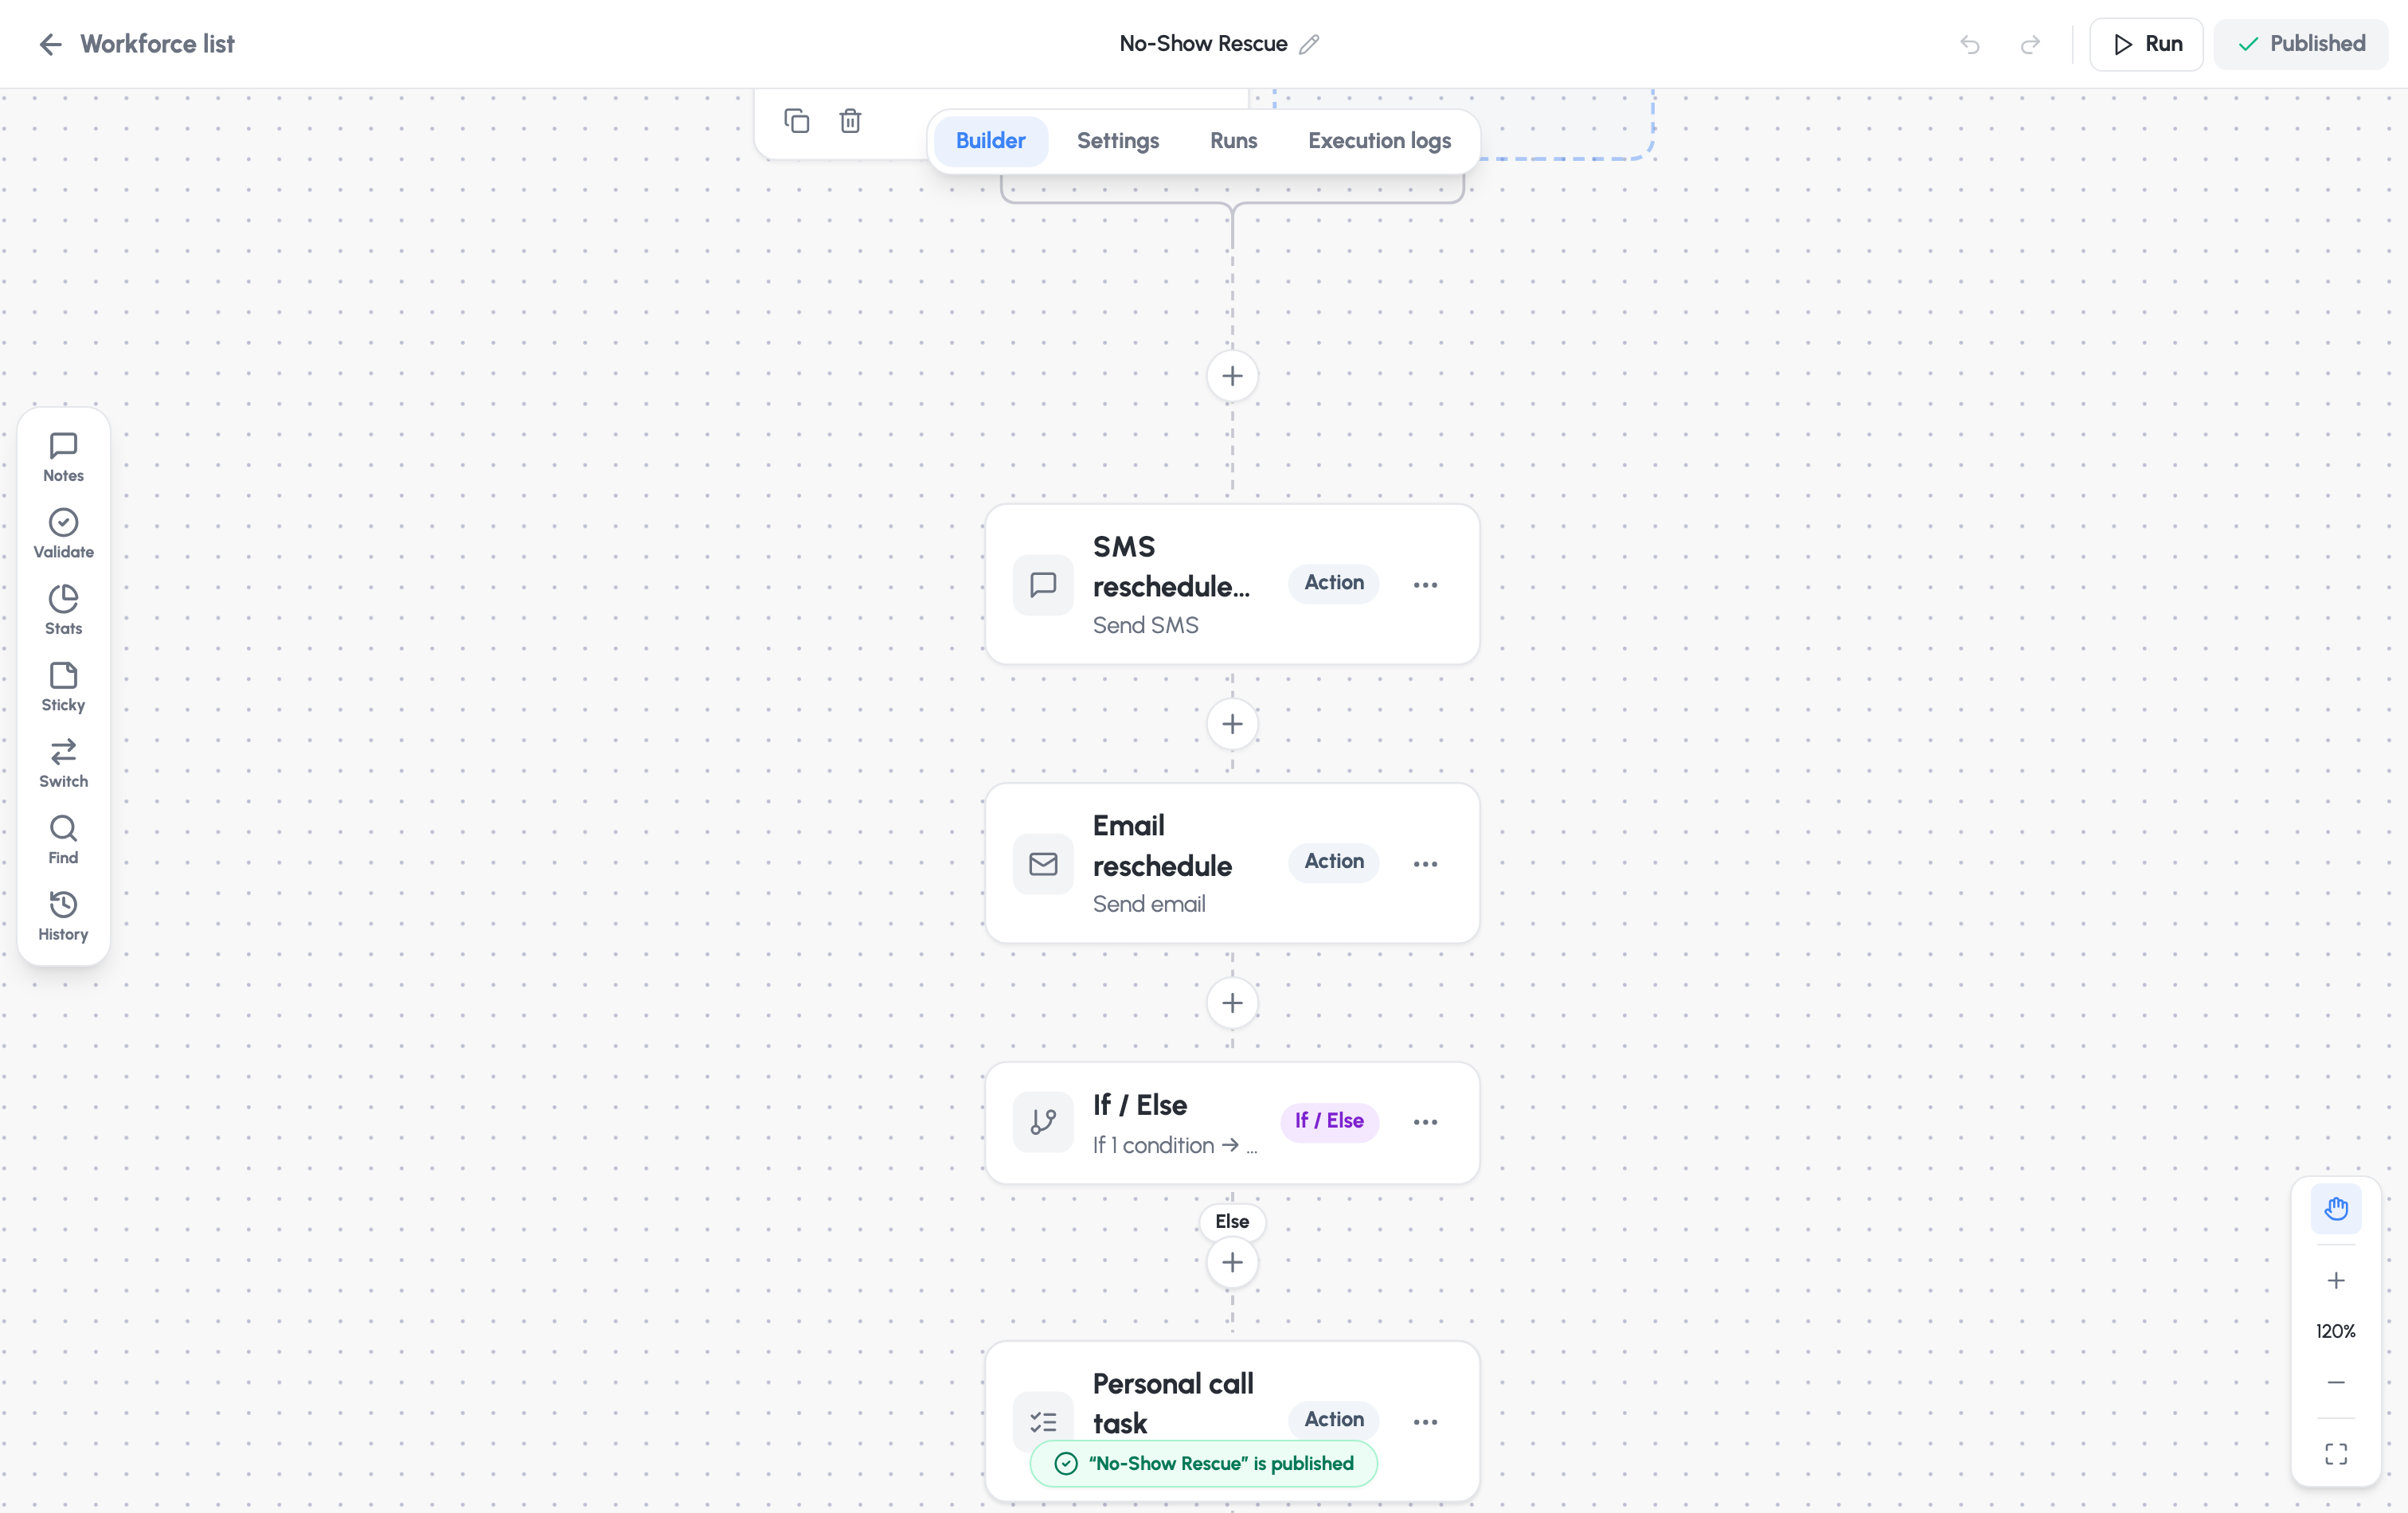
The builder at a glance
Top bar- Workforce list (back arrow) — returns to the roster. If you have unsaved changes, you’re asked first.
- Workforce name — click the pencil to rename inline.
- Undo / Redo, then Run (opens the test panel), then Publish.
Left toolbar — Notes, Validate (checks for publish-blockers), Stats,
Sticky notes, the Workforce switcher, Find & replace, and Version history. Most
have keyboard shortcuts shown on hover.
Add a trigger
Every workflow needs exactly one trigger — the event that enrols a contact. Click Add trigger and pick from the catalogue:
Add filters (“Only enrol when…”) to narrow who gets enrolled — the trigger
card shows how many filters are applied.
Add steps
Click the + on any connector between steps to open the step picker. Steps fall into two families — control-flow steps and actions — including the all-important AI Worker step that does the reasoning and messaging.A step you’re configuring opens in a panel over the canvas. Nothing is
added to the flow until you click Save in the panel — so you can back out of
a half-built step without leaving a mess.
Save, publish, and run
1
Save
Press ⌘S (or Save & leave). Saving keeps your draft — it does not
make the worker live.
2
Publish
Click Publish (or Publish Changes once it’s already live). Flow9
validates first; if something’s missing you’ll see “Can’t publish yet”
with the first thing to fix. Once published, the worker is live.
3
Run a test
Click Run to open the test panel and watch a full run end-to-end (see
below).
Test the Workforce
The Run button opens Run a test — run the whole flow once and watch it in the execution log.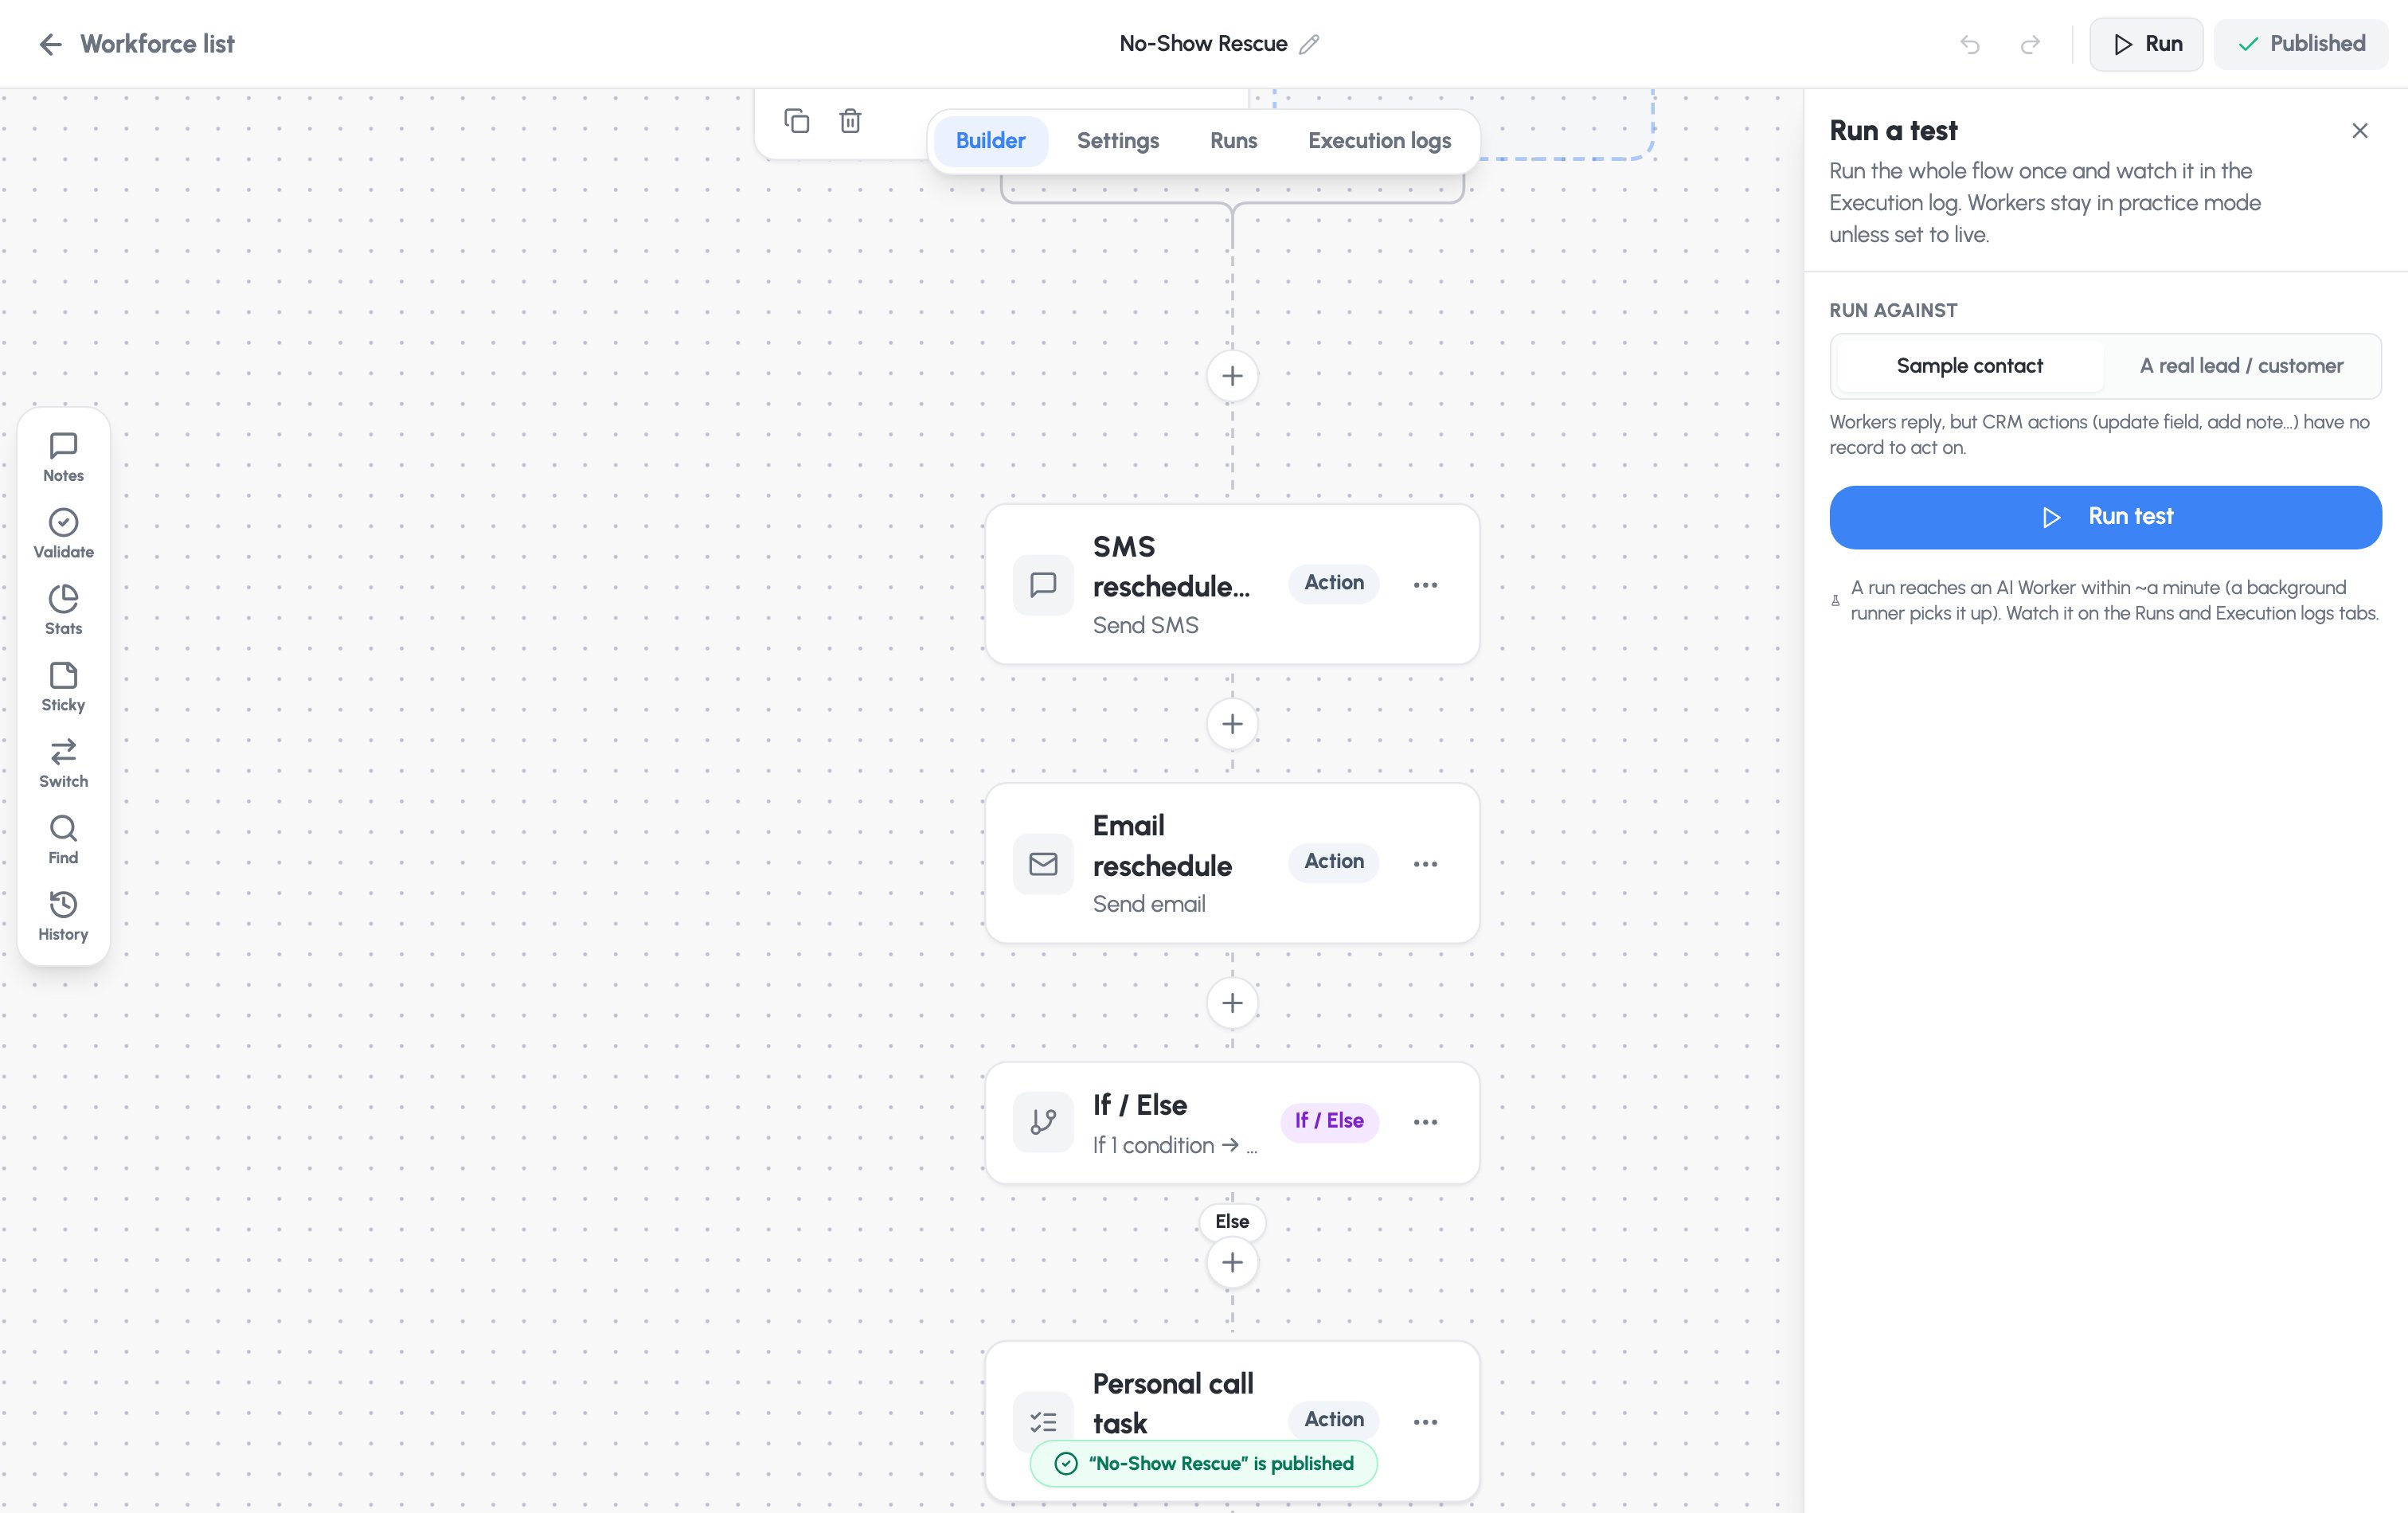
1
Choose what to run against
- Sample contact — workers reply, but CRM actions have no real record to change. Safe for a first look.
- A real lead / customer — CRM actions really run against the record you pick. Check the change in the log and on the record.
2
Add a sample message (if asked)
For flows triggered by an inbound message, type a sample incoming
message so the worker has something to respond to.
3
Run test
Click Run test. A background runner picks it up within about a minute —
follow it on the Runs and Execution logs tabs.
Only a published workflow can be test-run. Workers stay in practice mode
unless a step has Perform actions for real switched on — see
Steps & actions.
Re-entry rules
On the Settings tab, re-entry rules control how often the same contact can be enrolled. They’re enforced every time the workflow runs:- Allow re-entry — when off, a contact enrols at most once and never re-enters.
- Re-entry cooldown — don’t re-enrol the same contact within this many hours (a dedupe window).
- Maximum enrolments per contact — cap total enrolments (blank = unlimited).