Flow9 is not yet listed in Claude’s connector directory, so you add it
yourself as a custom connector. This works on every Claude plan,
including the free one.
Before you start
- An admin must have enabled AI access for your workspace — see Enabling AI connections
- You need your normal Flow9 login
claude.ai (web)
1
Open Settings
Click your name at the bottom left, then Settings.
2
Go to Connectors
In the settings sidebar, under Customize, choose Connectors.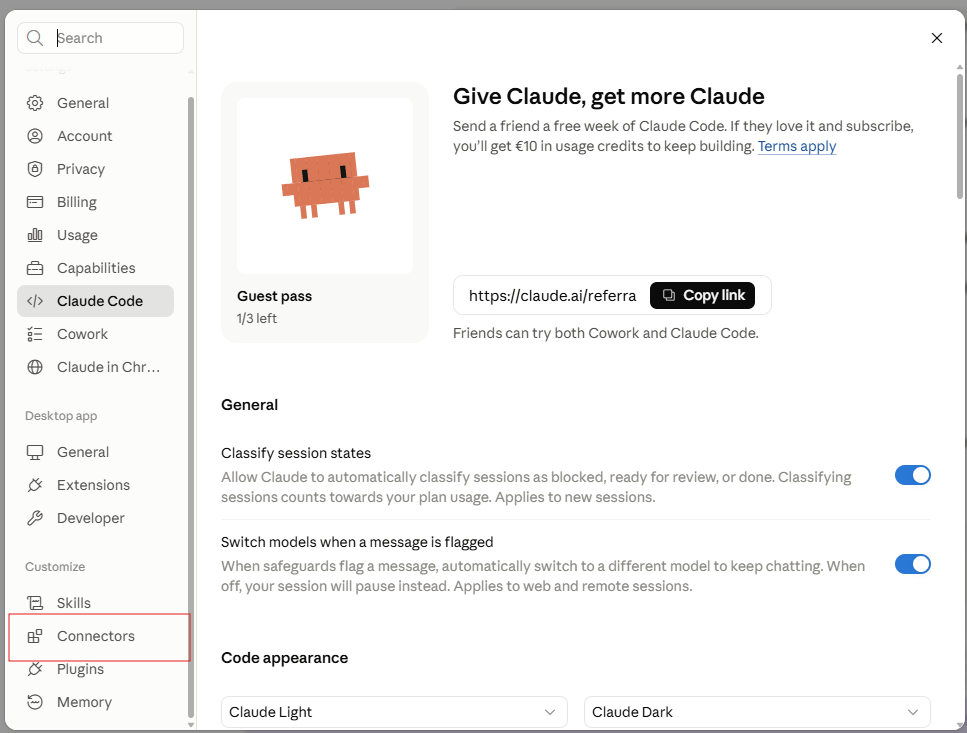
3
Open the Add menu
Click Add in the top right, then Add custom connector.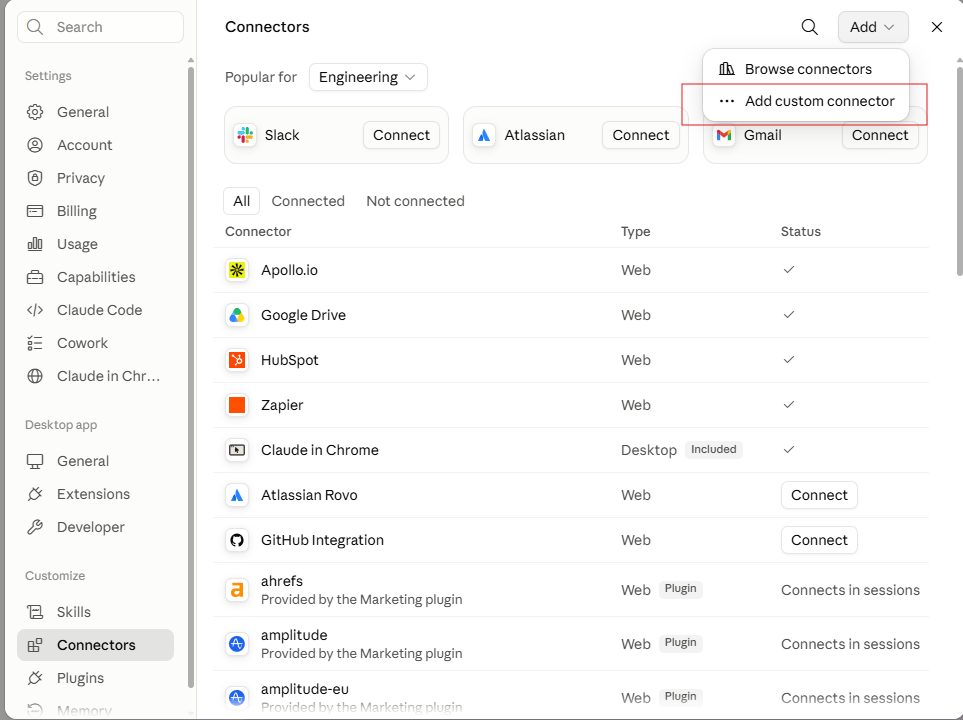
4
Enter the details
Name — 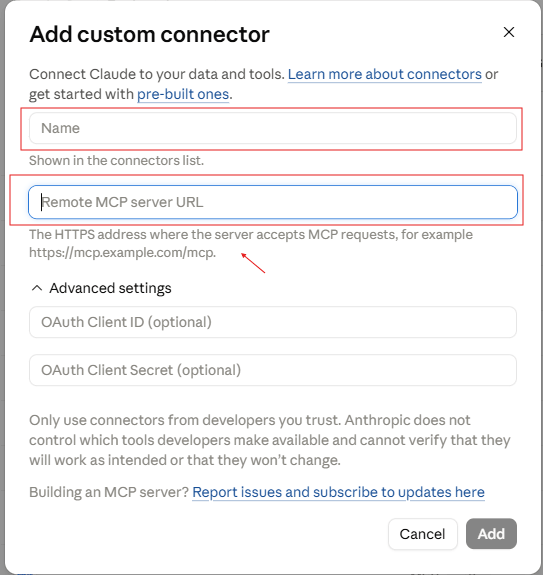
Flow9 (this is just the label in your connectors list)Remote MCP server URL — https://mcp.flow9.onlineLeave Advanced settings alone. The OAuth Client ID and Secret are
optional and Flow9 does not need them — Claude registers itself
automatically. Then click Add.5
Sign in to Flow9
Flow9 now appears in your connectors list. Click Connect and a Flow9
sign-in page opens in your browser. Sign in with your normal account.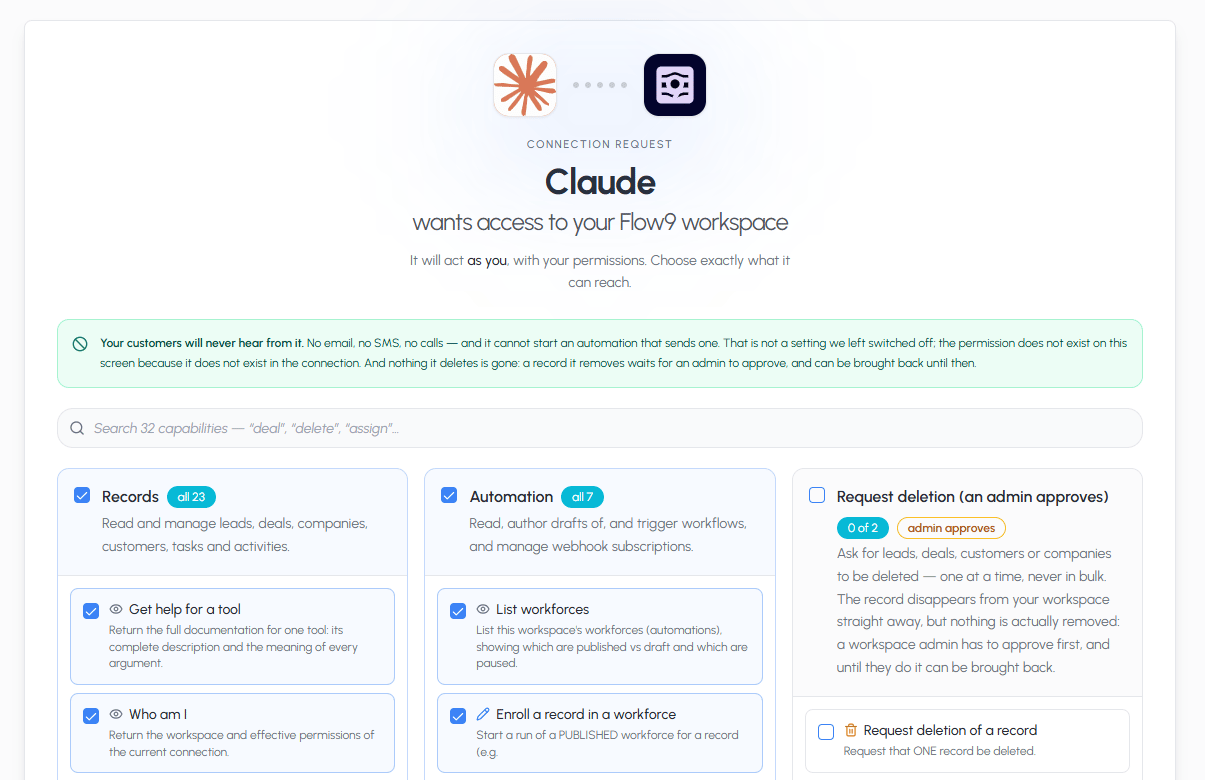
6
Choose what to allow
The consent screen lists what Claude is asking for, grouped by area. Tick a
whole group, or open a group and tick individual tools. Anything you leave
unticked is not granted — the tool is not offered to Claude at all.See Permissions for what each group covers.
7
Confirm it worked
Start a new chat and ask:Claude should reply with your workspace and the permissions you granted.
Claude Desktop
The steps are identical to the web app — Settings → Connectors → Add custom connector — and the connection is shared with claude.ai when you use the same account.Claude Code
In a terminal:/mcp inside Claude Code to check the connection.
Your first few prompts
Once connected, try these:Removing the connection
Two places, and either is enough:- In Claude — Settings → Connectors → remove Flow9
- In Flow9 — Settings → Connected Apps, then revoke