Workforce is an optional feature that admins enable under Workforce →
Feature Settings (“Enable for this organization”). If it’s off, the
Workforce pages are hidden for everyone.
For managers: plan and publish shifts
Open Workforce to plan a week at a time (use the week navigator at the top right):1
Define shift types first
In the Template & Rules tab, create your shift types — each with a
name, color, and start/end time. Sensible defaults (Morning, Evening,
Split, Off) are created for you the first time.
2
Fill the Duty Planner
In the Schedule tab, the planner shows one row per employee and one
column per day. Click any cell to assign a shift type (or Clear it).
Copy previous week saves re-entering a repeating pattern.
3
Publish the week
Toggle Publish when the week is ready — agents are notified of their
assigned shifts. You can unlock the week again to make changes.
For agents: My Schedule
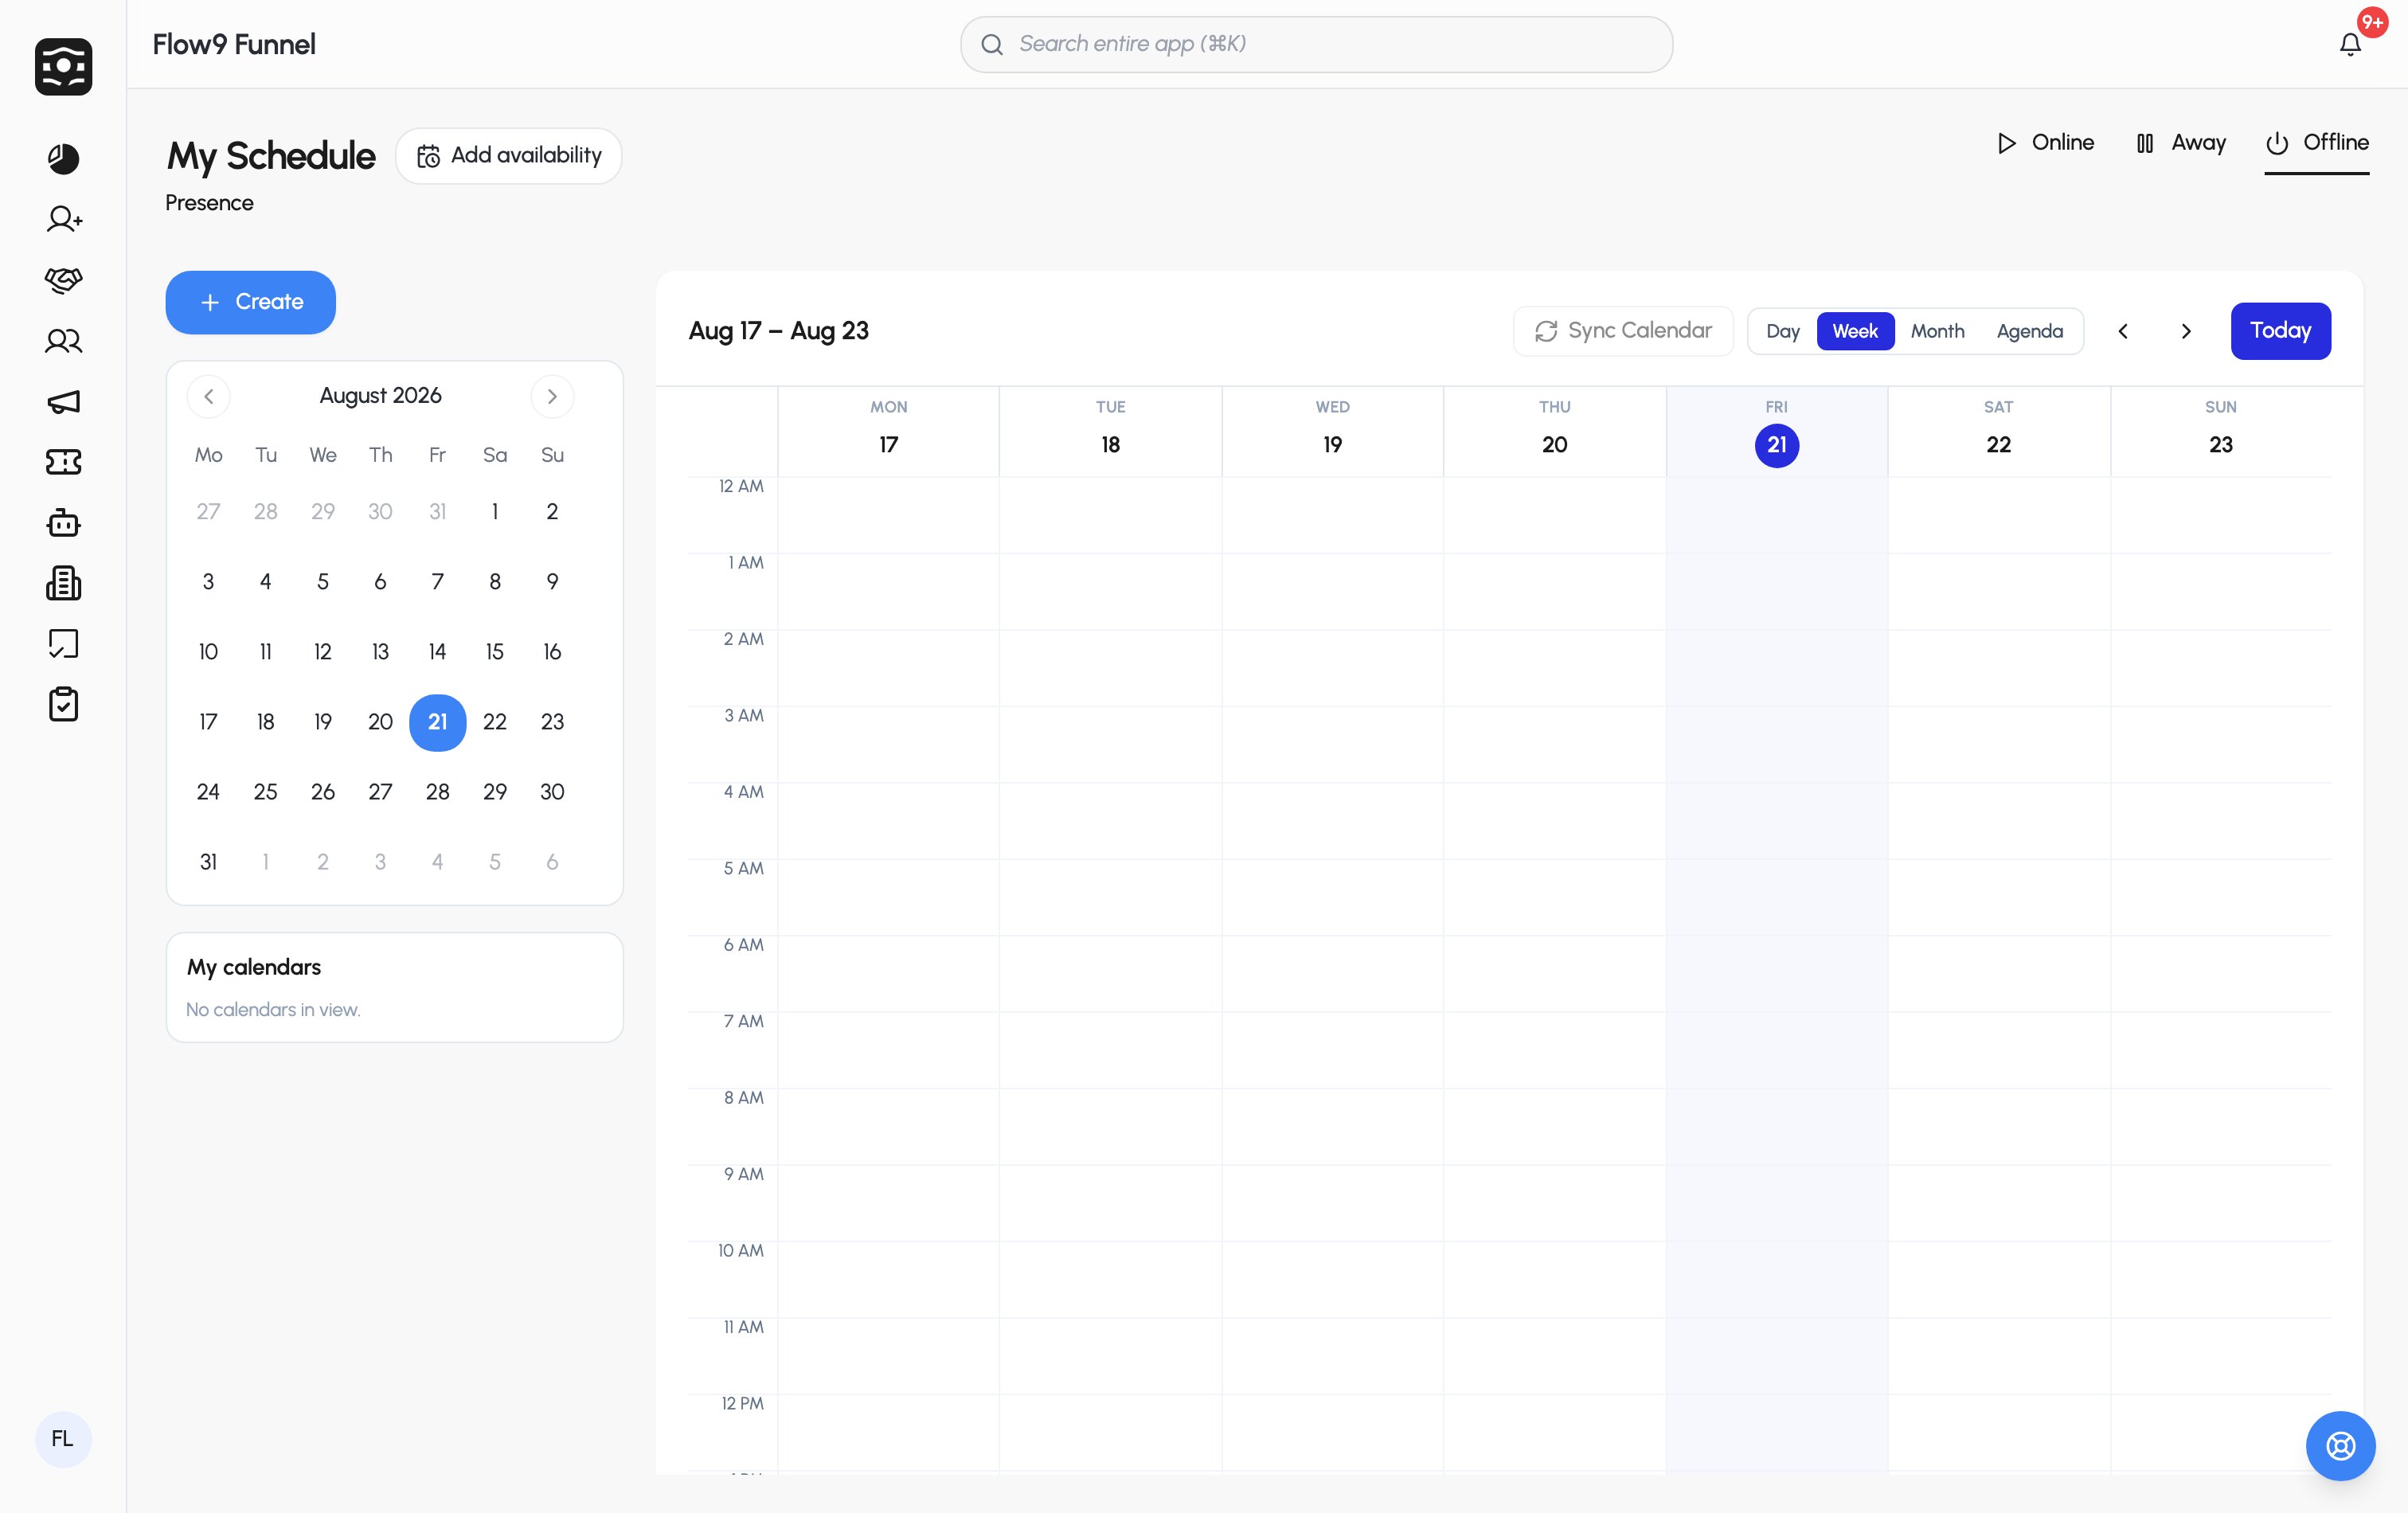
My Schedule is your personal calendar — day, week, month, and agenda views, with your assigned shifts, CRM events, SLA items, and synced Google Calendar events each toggleable in the “My calendars” list.- Set your presence — the Online / Away / Offline control in the header tells your manager (and routing) whether you’re reachable.
- Manage your availability — Edit availability opens a drawer where you set your timezone, weekly working windows per day, buffers before/after meetings, minimum lead time, and daily/weekly booking caps. An out-of-office entry overrides everything — no routing or bookings while it’s active.
- Create events — same smart availability checking described in Email & calendar.
Your working hours and availability aren’t just informational — they feed
appointment booking and lead routing, so keeping them current means you only
get booked when you’re actually reachable.