Flow9 is not yet published in ChatGPT’s plugin directory, so you add it
yourself. That is a normal, supported flow — not a workaround.
Before you start
- An admin must have enabled AI access for your workspace — see Enabling AI connections
- Your normal Flow9 login
Turn on Developer mode
1
Open Plugins in Settings
Click your name at the bottom left, then Settings, then Plugins.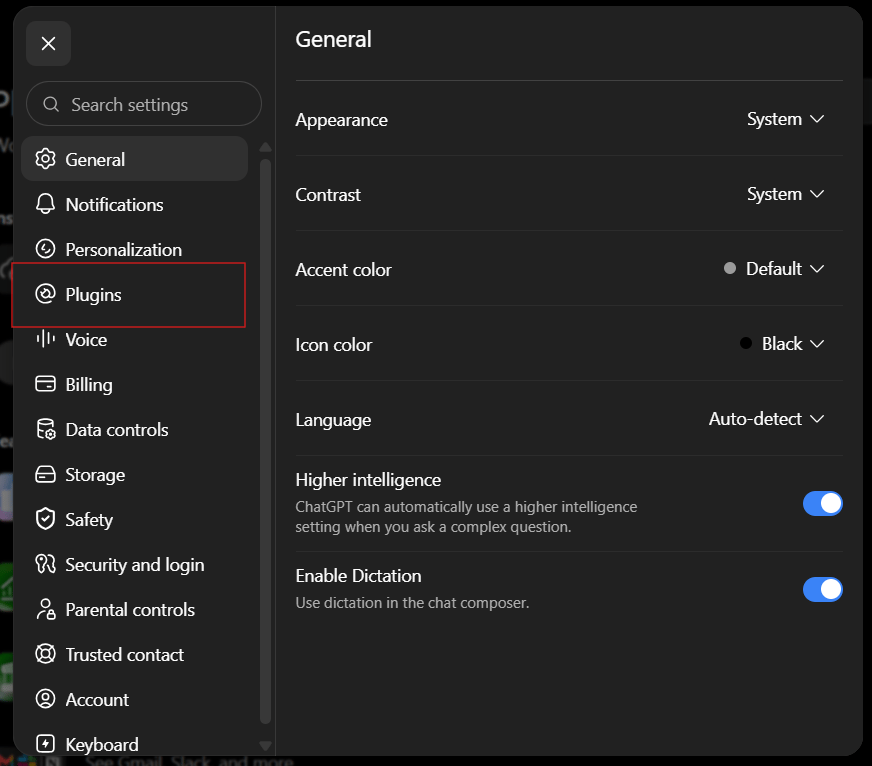
2
Switch on Developer mode
Open Developer mode and enable it. Then go back and choose
Browse plugins.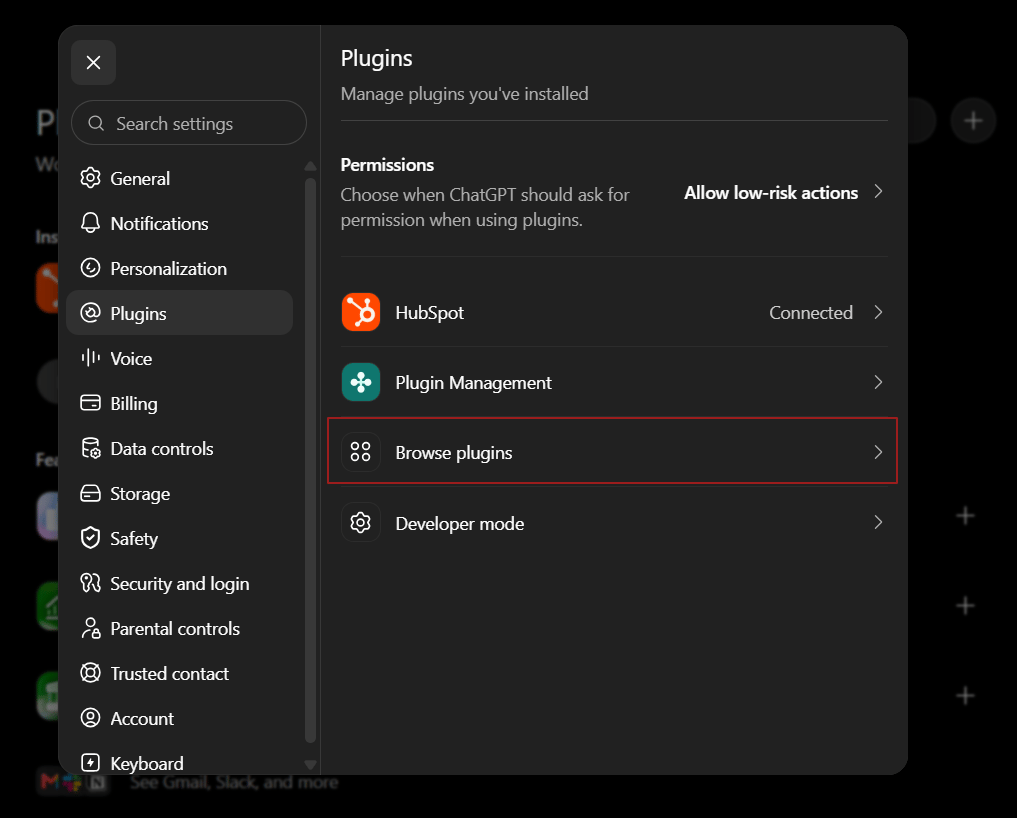
Add Flow9
1
Start a new plugin
On the Plugins page, click the + button at the top right, next to the
search box. If it is not there, Developer mode is still off.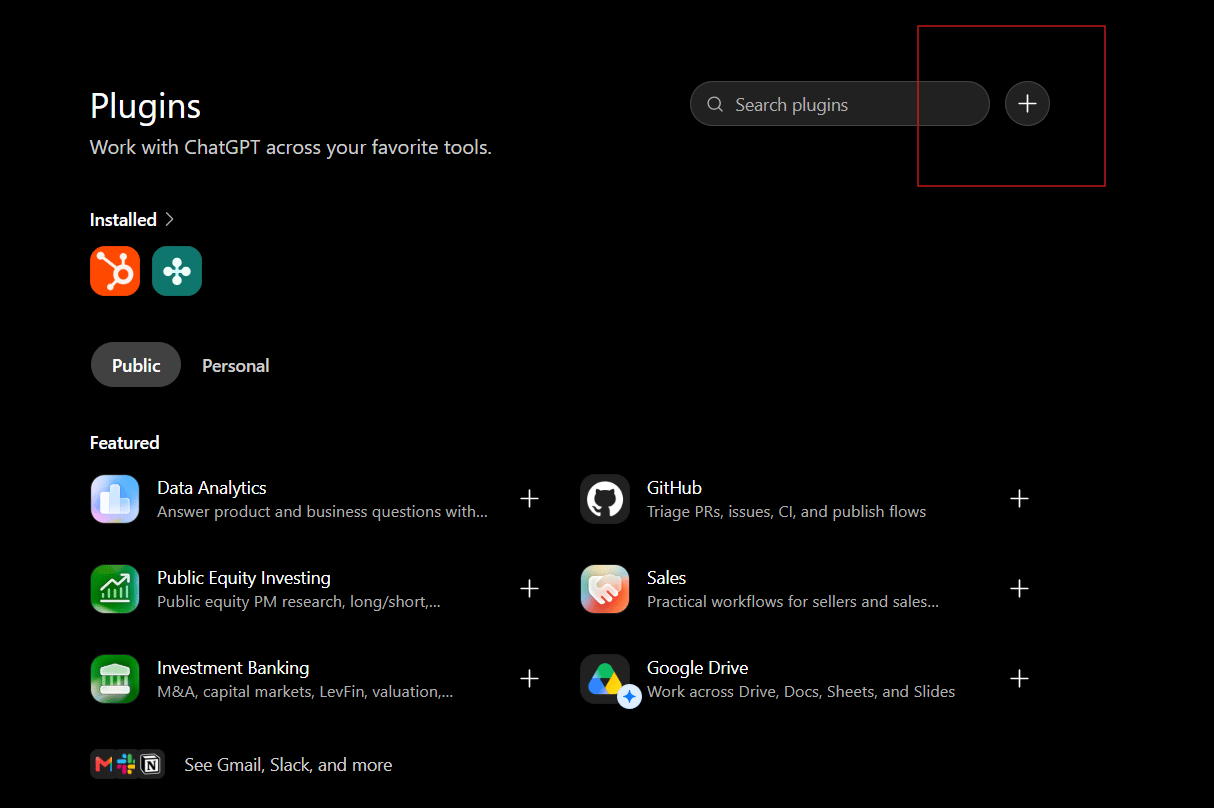
2
Fill in the details
Name — Authentication — choose OAuth. Leave Advanced OAuth settings
alone; ChatGPT discovers those from Flow9 once the URL is in.Icon and description are optional.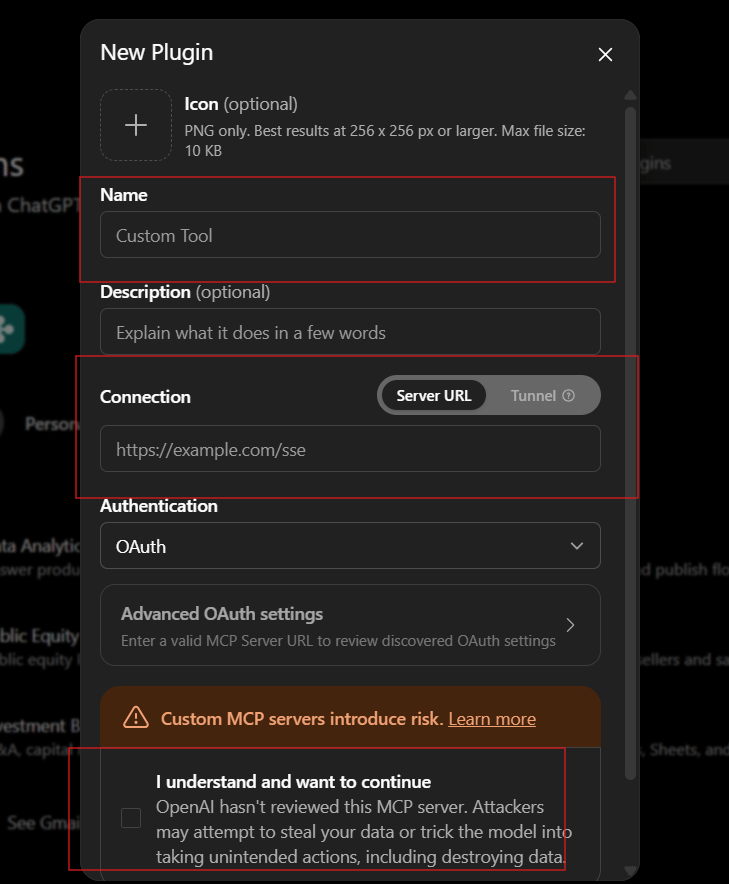
Flow9Connection — leave it on Server URL and paste:3
Acknowledge the warning
ChatGPT warns that it has not reviewed this server, because Flow9 is not in
its directory yet. Tick I understand and want to continue.This warning appears for every custom server. What Flow9 can actually do is
decided by you on the next screen and by your workspace admin — see
Security.
4
Sign in to Flow9
Click Sign in with Flow9 and sign in with your normal account.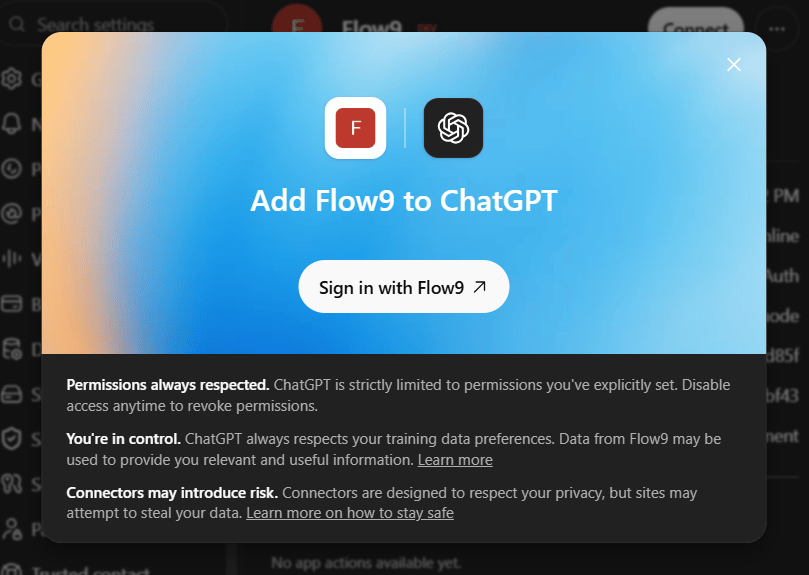
5
Choose what to allow
The Flow9 consent screen lists what ChatGPT is asking for, grouped by area.
Tick a whole group, or open one and tick individual tools.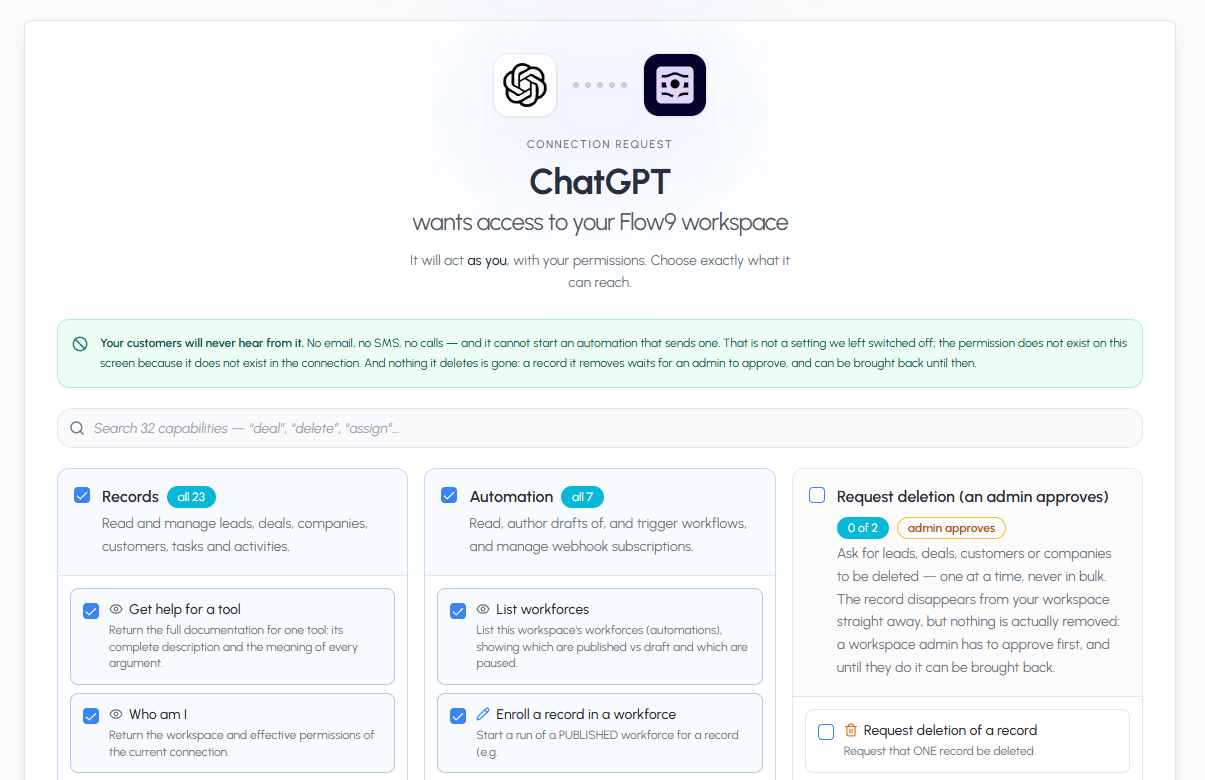
Set the plugin’s permissions
Go to Settings → Plugins → Flow9 → Permissions and choose the level you want: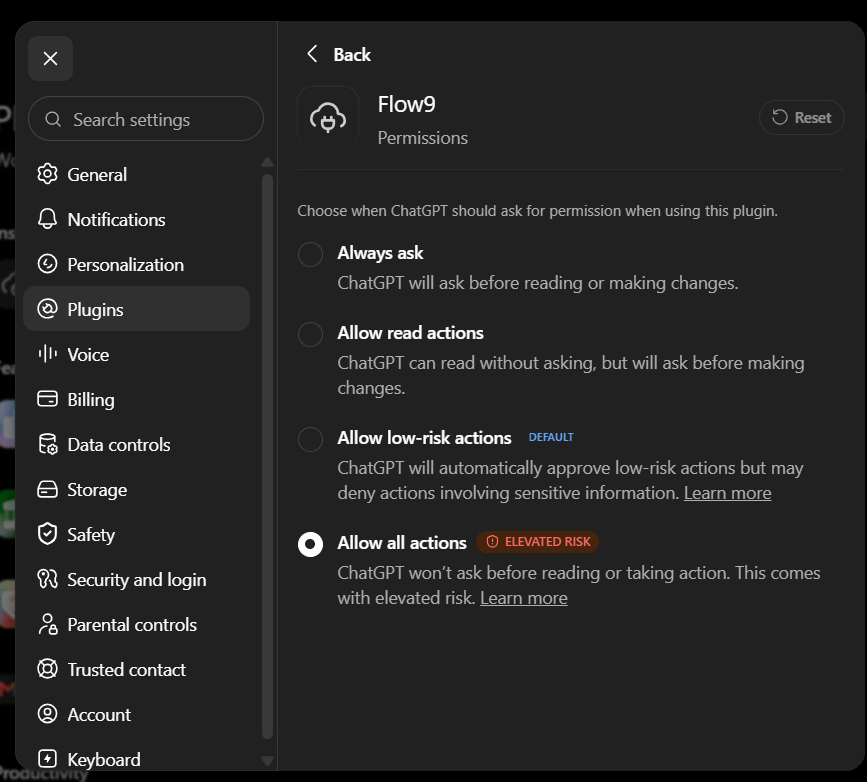
If ChatGPT says the action was blocked
You may see a reply like “I couldn’t do that because the connector blocked the action.” First check the permission setting above. Allow low-risk actions is the usual cause, and it is the default.If permissions are already set to allow the action, this is usually not Flow9.
ChatGPT runs its own safety check before it sends anything to a plugin. When
that check stops a request, the request never reaches us — nothing appears in
our logs — but the wording can make it sound as though we refused.
- Try again. The behaviour is intermittent.
- Switch to a thinking model and repeat the request.
- Re-check the plugin’s permission level.
Removing the connection
- In ChatGPT — Settings → Plugins → Flow9, then remove it
- In Flow9 — Settings → Connected Apps, then revoke