Hire a worker
1
Start hiring
On Your AI Workforce, click Hire AI Worker (top-right). On an empty
workspace you’ll see Hire your first AI Worker instead — same thing.
2
Pick a role
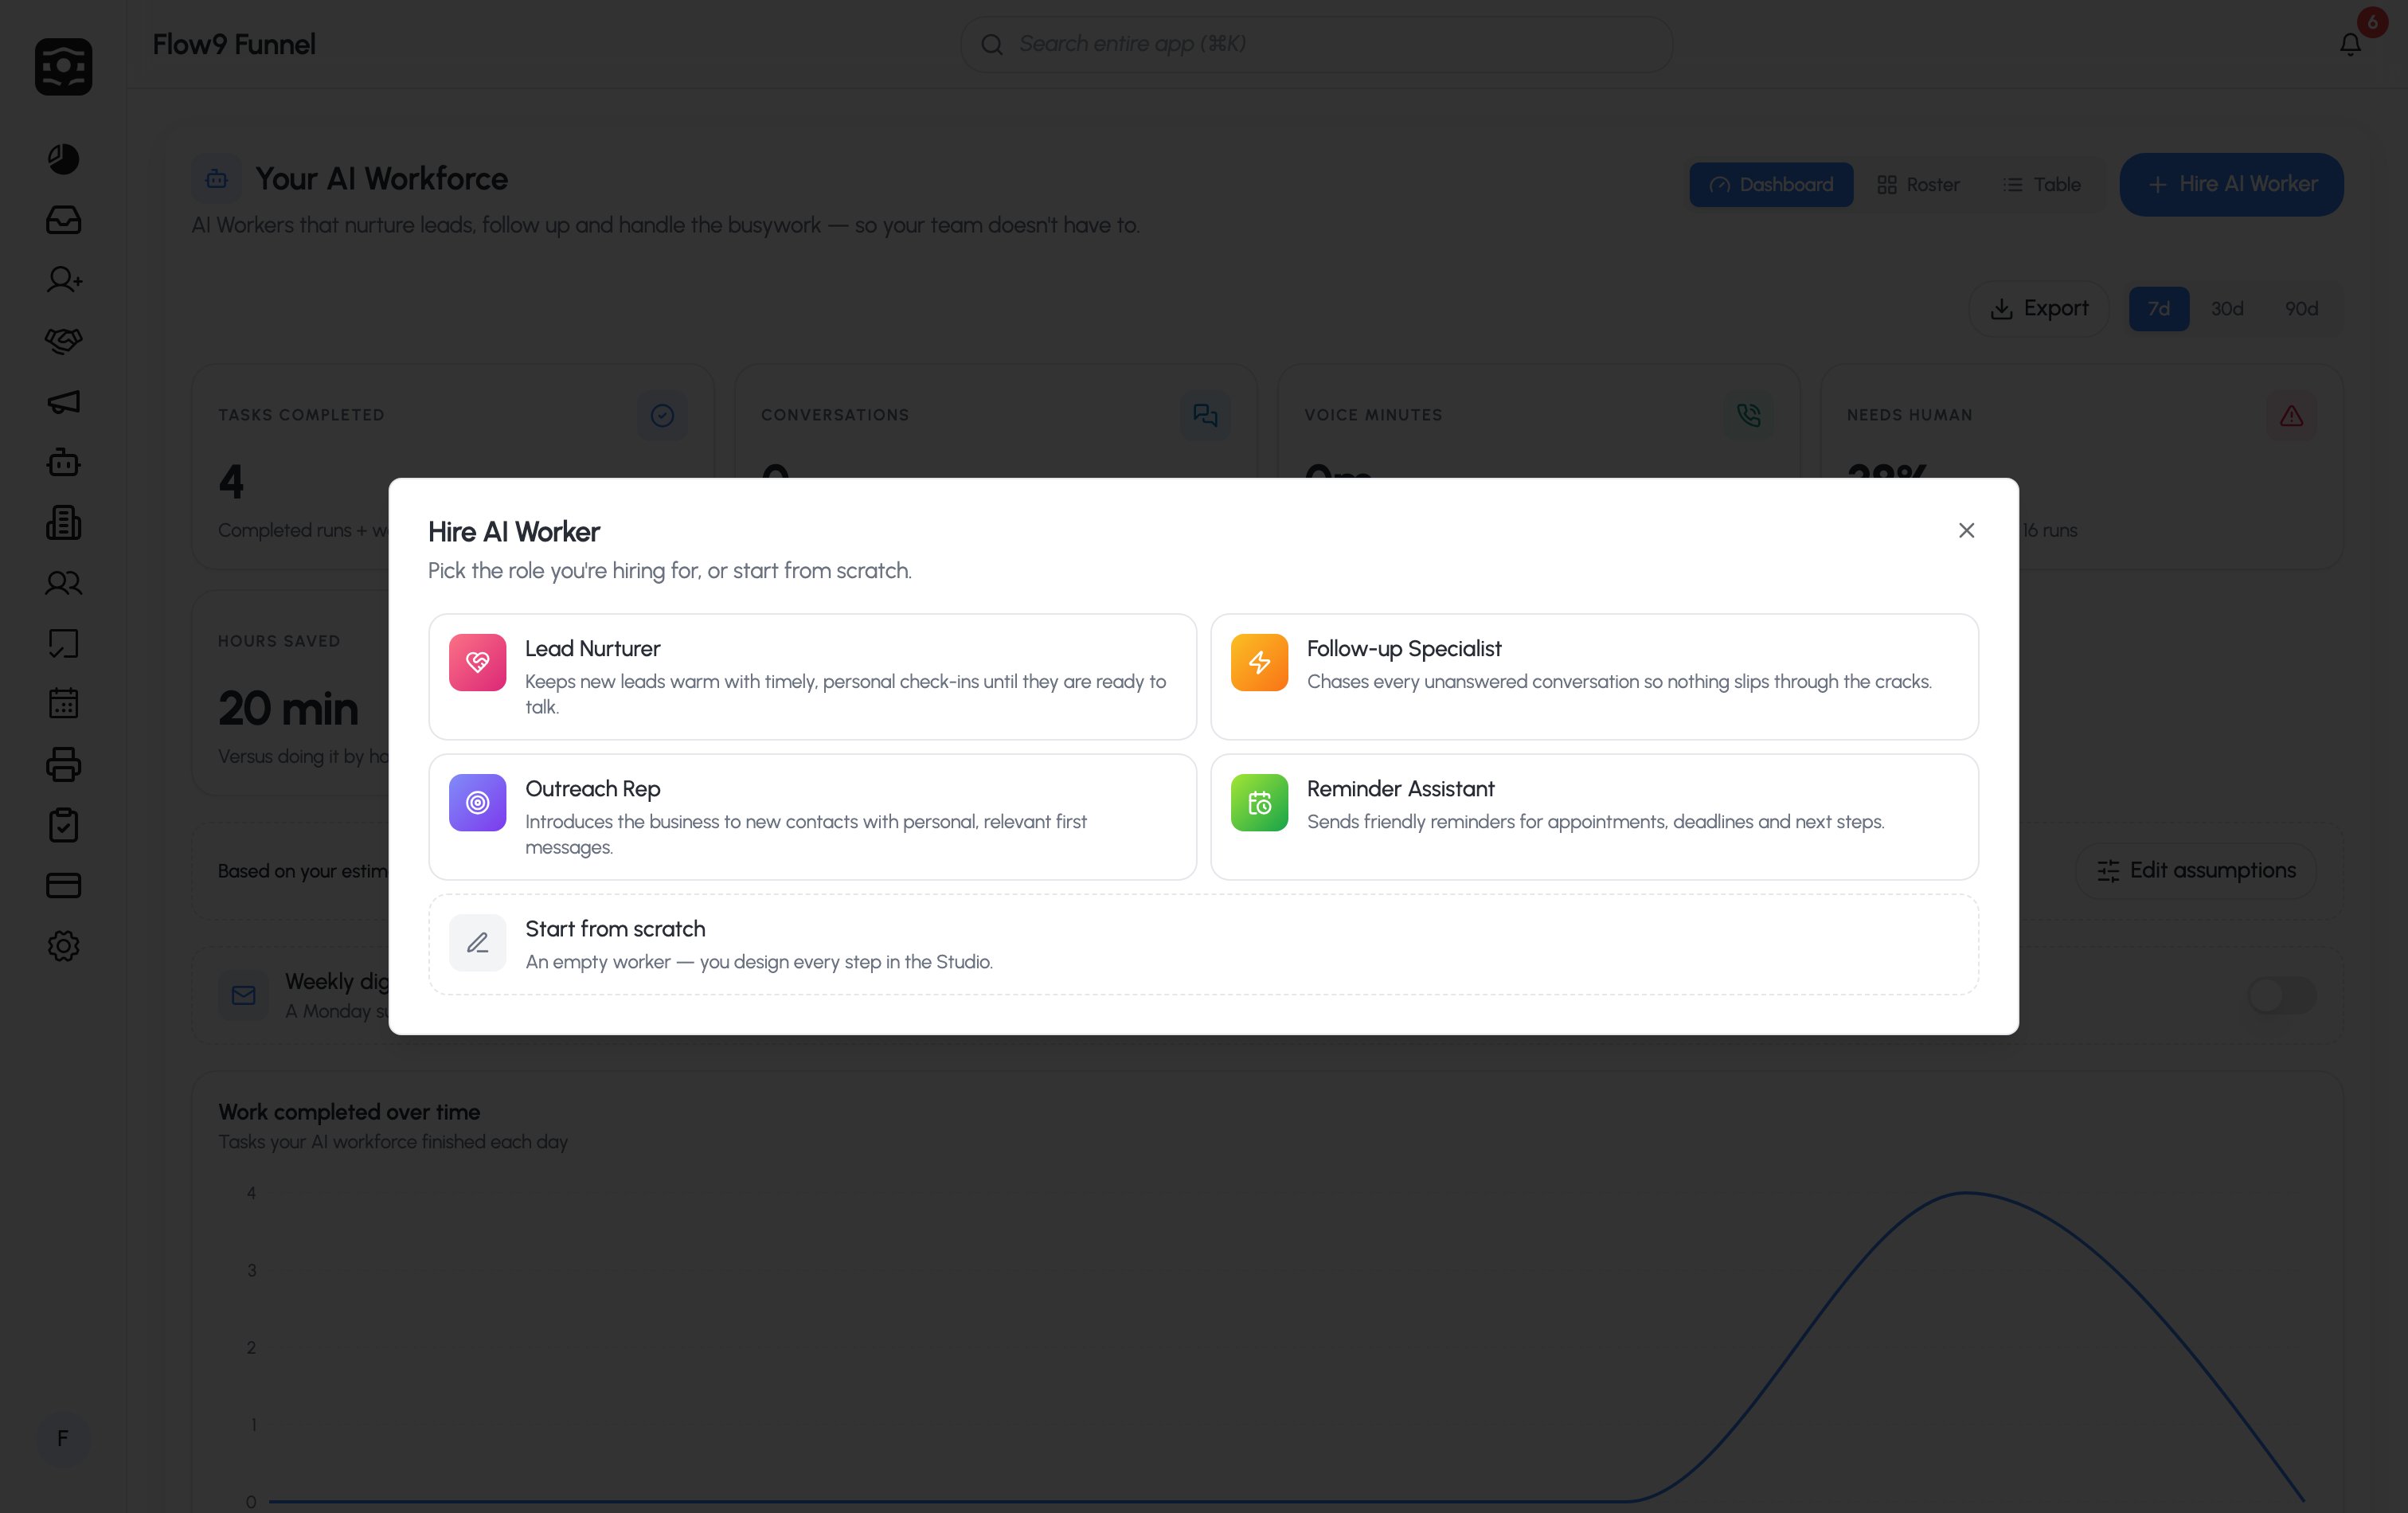
Choose a role template, or Start from scratch for an empty worker you
design step by step:
A role template pre-fills a starting workflow so you’re not staring at a
blank canvas.
3
Name it and pick an avatar
Give the worker a name your team will recognise (each role suggests
one — Ava, Max, Nova, Remi) and choose an avatar. Avatars are
illustrated marks — Spark, Bolt, Echo, Haven, Onyx, Relay, Scout, Tempo,
Chrono — never stock faces.
4
Hire
Click Hire worker. You land straight in the Studio with the
template’s workflow ready to edit.
The worker’s identity
A worker carries an identity everywhere it appears — on the roster, in the Studio, and in reports:- Name — what you and your team call it.
- Role — a short title (e.g. “Lead Nurturer”).
- Mission — a one-line description of what it’s responsible for. Cards show Add a mission → until you set one.
- Avatar — its illustrated mark, with a live status dot.
The roster
Switch to the Roster view to see your workers as cards. Each card shows:- The avatar and a live status dot
- The worker’s name and role
- Its mission (or the Add a mission prompt)
- Runs · 7d — how many times it has run in the last 7 days
- Last active — e.g. “Just now”, “5m ago”, “3h ago”, “2d ago”
The worker profile
Click a worker to open its profile, which has three tabs: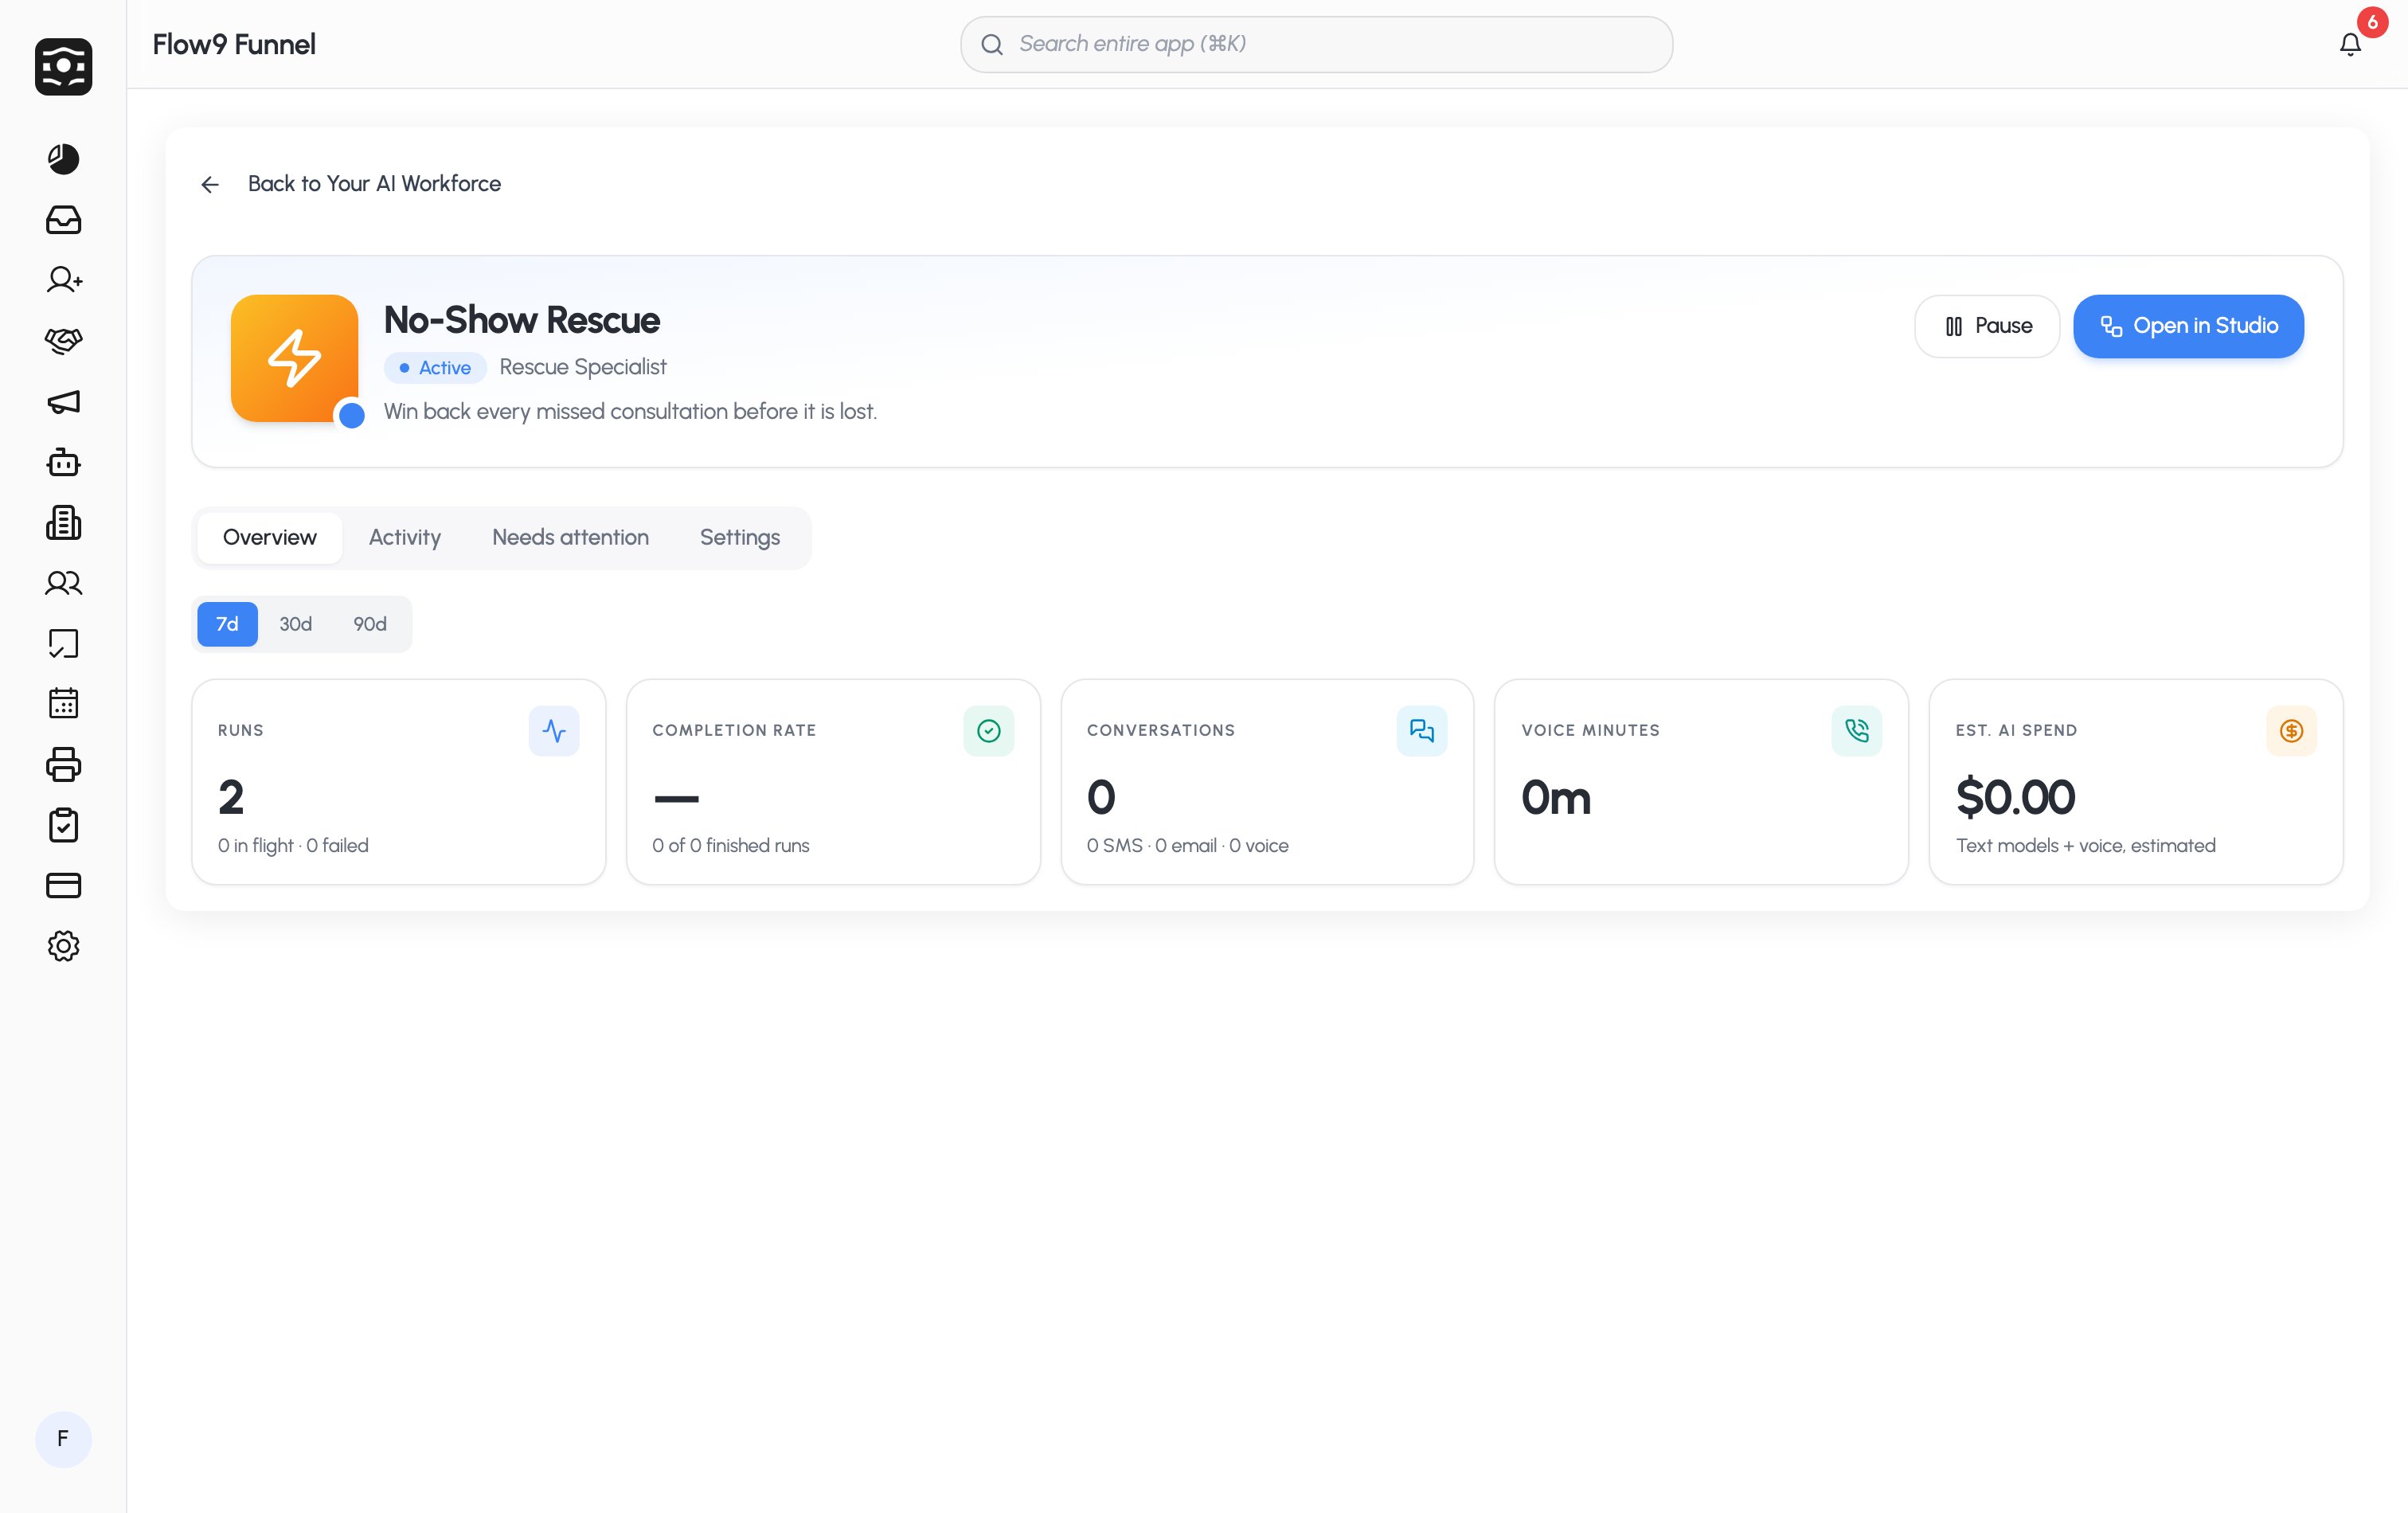
Ready to design what your worker does? Head to
Build a workflow.